So, here's the deal. You've probably heard about Raspberry Pi, right? That tiny but powerful little device that's making waves in the tech world. Well, today we're diving deep into one of its coolest capabilities—raspberry pi remote monitoring. It’s not just a buzzword; it's a game-changer for tech enthusiasts, hobbyists, and even businesses looking to streamline their operations. If you're reading this, chances are you're curious about how to harness this power. Stick around because we're about to blow your mind with some awesome insights.
Imagine being able to keep an eye on your home security system, monitor server performance, or even track environmental conditions—all from the comfort of your couch or halfway across the globe. Sounds like science fiction? Nope, it's real, and it's all possible thanks to Raspberry Pi remote monitoring. Whether you're a seasoned pro or a newbie just dipping your toes into the world of IoT (Internet of Things), this technology has something for everyone.
Now, before we dive headfirst into the nitty-gritty, let's get one thing straight. This isn't just about setting up a cool gadget. It's about empowering you to take control of your tech environment, save time, and even save money. So, whether you're looking to automate your smart home or manage a fleet of remote sensors, this article is your ultimate guide. Let's get started, shall we?
Read also:What Is The Salt Trick For Men To Increase Size The Ultimate Guide
What Exactly is Raspberry Pi Remote Monitoring?
Alright, let's break it down. Raspberry Pi remote monitoring is essentially the process of using a Raspberry Pi to monitor and manage devices, systems, or environments remotely. Think of it as your personal tech assistant that works tirelessly to keep everything in check, no matter where you are. This setup can range from simple home automation projects to complex industrial applications.
Here are a few scenarios where raspberry pi remote monitoring shines:
- Home security systems that alert you when someone's at the door.
- Environmental sensors that track temperature, humidity, and air quality.
- Server monitoring tools that notify you of performance issues before they become critical.
And the best part? You don't need a degree in computer science to set it up. With a bit of tinkering and the right resources, anyone can get started. Now, let's take a closer look at why Raspberry Pi is such a great choice for remote monitoring.
Why Choose Raspberry Pi for Remote Monitoring?
There are plenty of options out there for remote monitoring, so why should you choose Raspberry Pi? Here are a few compelling reasons:
Cost-Effective Solution
Raspberry Pi is incredibly affordable compared to other dedicated hardware solutions. For less than $50, you can get a fully functional device that can handle a wide range of monitoring tasks. This makes it an attractive option for hobbyists and small businesses on a budget.
Highly Customizable
Unlike pre-built solutions, Raspberry Pi allows you to tailor the setup to your specific needs. Whether you're monitoring a single sensor or an entire network of devices, Raspberry Pi can be configured to meet your requirements.
Read also:Salt Trick Penis Enlargement The Truth Behind The Hype
Vibrant Community Support
One of the biggest advantages of using Raspberry Pi is the vast community of users who are more than happy to share their knowledge and resources. From forums to YouTube tutorials, you'll find plenty of help when you need it.
Setting Up Raspberry Pi for Remote Monitoring
Now that we've established why Raspberry Pi is such a great choice, let's talk about how to set it up for remote monitoring. Here's a step-by-step guide to get you started:
What You'll Need
- Raspberry Pi (any model will do, but newer models offer better performance).
- A microSD card with Raspberry Pi OS installed.
- A stable internet connection.
- Any sensors or devices you want to monitor.
Step 1: Install the Necessary Software
Before you can start monitoring, you'll need to install the right software on your Raspberry Pi. Depending on your project, this could include tools like:
- MQTT for communication between devices.
- Node-RED for visual programming.
- Home Assistant for home automation.
Don't worry if these terms sound foreign right now. We'll cover them in more detail later.
Step 2: Connect Your Sensors
Once your software is up and running, it's time to connect your sensors. This could be anything from a simple temperature sensor to a complex environmental monitoring station. The beauty of Raspberry Pi is its ability to work with a wide variety of sensors, so the possibilities are almost endless.
Step 3: Configure Remote Access
Now comes the fun part—setting up remote access. There are several ways to do this, including:
- SSH (Secure Shell) for secure command-line access.
- VNC (Virtual Network Computing) for graphical access.
- Web interfaces for easy monitoring from any device.
Choose the method that best suits your needs, and you'll be monitoring your setup in no time.
Popular Use Cases for Raspberry Pi Remote Monitoring
So, what can you actually do with Raspberry Pi remote monitoring? Let's explore some popular use cases:
Home Automation
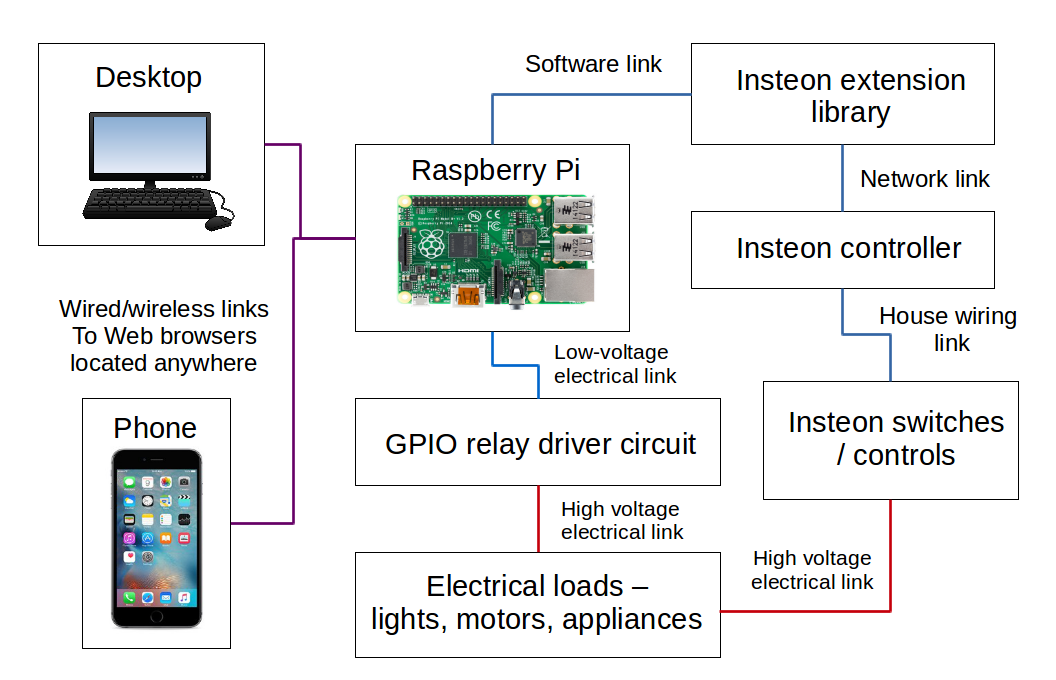
Turn your home into a smart home with Raspberry Pi. Control lights, thermostats, and even your coffee maker from anywhere in the world. It's not just about convenience; it's about creating a more energy-efficient home.
Environmental Monitoring
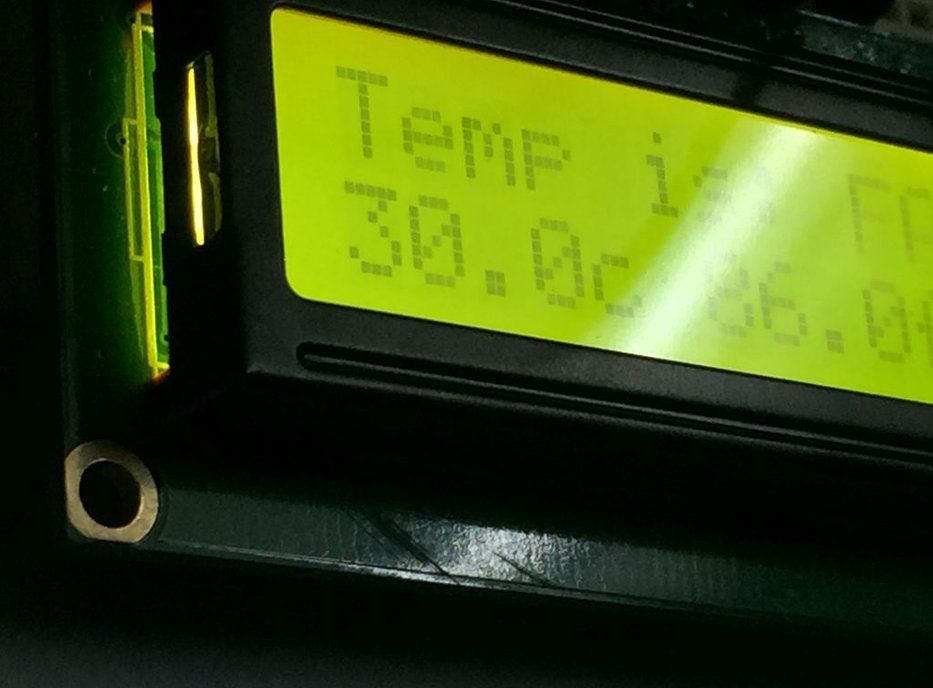
Keep tabs on the environment around you with sensors that measure temperature, humidity, air quality, and more. This is particularly useful for farmers, greenhouse owners, and environmentalists.
Server Monitoring
For businesses, Raspberry Pi can be a cost-effective solution for monitoring server performance. Get real-time alerts for issues like high CPU usage or disk space running low, allowing you to address problems before they escalate.
Challenges and Solutions
Of course, no technology is without its challenges. Here are a few common issues you might encounter with raspberry pi remote monitoring and how to overcome them:
Security Concerns
With remote access comes the risk of unauthorized access. To mitigate this, always use strong passwords, enable two-factor authentication, and keep your software up to date.
Bandwidth Limitations
If you're monitoring a large number of devices, bandwidth can become an issue. Consider using data compression techniques or limiting the frequency of data transmissions to conserve bandwidth.
Tools and Software for Raspberry Pi Remote Monitoring
Now that you know what you can do with Raspberry Pi remote monitoring, let's talk about the tools and software that can help you achieve your goals:
MQTT
MQTT (Message Queuing Telemetry Transport) is a lightweight messaging protocol perfect for IoT applications. It allows devices to communicate efficiently, even over low-bandwidth connections.
Node-RED
Node-RED is a flow-based programming tool that makes it easy to wire together hardware devices, APIs, and online services. It's a great option for visualizing and managing your monitoring setup.
Home Assistant
Home Assistant is an open-source home automation platform that integrates with a wide range of devices and services. It's a fantastic choice for those looking to create a fully integrated smart home.
Data and Statistics
To give you a better idea of the impact of Raspberry Pi remote monitoring, here are a few interesting stats:
- As of 2023, over 50 million Raspberry Pi units have been sold worldwide.
- According to a survey by IoT Analytics, 60% of IoT projects involve some form of remote monitoring.
- Raspberry Pi is one of the most popular platforms for DIY IoT projects, with thousands of tutorials and resources available online.
These numbers speak volumes about the popularity and potential of Raspberry Pi in the world of remote monitoring.
Expert Tips and Best Practices
Here are a few expert tips to help you get the most out of your Raspberry Pi remote monitoring setup:
- Start small and scale up as you gain experience.
- Document your setup and configurations for future reference.
- Regularly back up your data to prevent loss in case of hardware failure.
By following these best practices, you'll be well on your way to creating a robust and reliable monitoring system.
Conclusion
And there you have it—a comprehensive guide to raspberry pi remote monitoring. From understanding what it is to setting it up and exploring its many use cases, we've covered everything you need to know to get started. Remember, the key to success is experimentation and learning from your experiences.
So, what are you waiting for? Grab your Raspberry Pi, roll up your sleeves, and start building your own remote monitoring system today. And don't forget to share your experiences in the comments below. Who knows, you might just inspire someone else to join the Raspberry Pi revolution!
Table of Contents
Revolutionize Your Tech Game with Raspberry Pi Remote Monitoring
What Exactly is Raspberry Pi Remote Monitoring?
Why Choose Raspberry Pi for Remote Monitoring?
Setting Up Raspberry Pi for Remote Monitoring
Popular Use Cases for Raspberry Pi Remote Monitoring
Tools and Software for Raspberry Pi Remote Monitoring