Creating a truly striking balloon display for your next celebration might seem like a task only for those with years of experience, but honestly, it is that much simpler than you might suppose. You can learn how to create a really beautiful balloon arch for your upcoming gathering with this truly straightforward do-it-yourself guide. It is a way to add a special touch without needing lots of time or a big budget, which is pretty neat, you know.
Many folks look at these impressive balloon structures and think they must be very involved or need some sort of special skill. The truth is, these decorations, which seem quite grand and a bit tricky, are actually quite easy to put together. We've gathered some simple steps for anyone who wants to figure out how to make a balloon arch or a long balloon garland the easy way, so you do not have to guess or feel unsure about where to begin, which is helpful, right?
Whether you are putting together a birthday bash, a little one's welcoming party, or even a get-together for a big achievement, a homemade balloon arch is a really good idea for brightening up the space. Once you get the hang of making one, you will find it brings a lot more cheer to any occasion, truly making the atmosphere feel more festive and fun, so it's almost a must-do.
Table of Contents
- What Makes a Balloon Arch So Special?
- Why Try Making Your Own Balloon Arch?
- Getting Started - Your First Steps to How to Make a Balloon Arch
- Air or Helium - Which Way to Make a Balloon Arch?
- What Tools Do You Need to Make a Balloon Arch?
- Step-by-Step Guide - How to Make a Balloon Arch with Air
- Creative Ideas for Your Next How to Make a Balloon Arch Project
- Final Touches for Your Balloon Arch Creation
What Makes a Balloon Arch So Special?
Balloon arches, it turns out, are a rather wonderful addition to nearly any kind of celebration or gathering, wouldn't you agree? They have this way of catching the eye, making a space feel more celebratory, and just generally adding a touch of grandeur. People often think they are very intricate and require a lot of effort to put together, but the truth is, they are quite simple to construct. You can put together a pretty basic one without too much fuss, which is nice, you know.
These large, curved displays of colorful balloons truly have a knack for transforming an ordinary room into something quite extraordinary. They draw people's attention, making a clear statement about the fun that is about to happen or is already underway. It is almost like they are saying, "Something special is happening here!" They are a visual treat that guests tend to remember, and they make for some really good photos, too. That visual impact, for such a straightforward project, is really what makes them stand out, so they are very popular.
The appeal is not just in their appearance, though. There is a real sense of accomplishment that comes from making something so visually striking with your own hands. It is a way to personalize your event, adding a touch that feels truly unique and made with care. Plus, the sheer joy these colorful shapes bring to children and adults alike is something to behold. It is a simple decoration that brings a lot of happiness, and that is a pretty good reason to give it a try, I mean, honestly.
Why Try Making Your Own Balloon Arch?
When I first started out, a bit like a newcomer to this kind of thing, I went through all the tips and little tricks I could find, trying them out to see what worked best. There were so many pieces of advice scattered around, and it took a bit of digging to get a clear picture. After all that testing, I have put together everything I figured out right here for you. This means you will not have to spend nearly as much time searching and experimenting, which is a big help, actually.
The reason for sharing all this is pretty straightforward: to save you the trouble I went through. There is no need for you to spend hours upon hours trying to piece together how to make a balloon arch from various sources. This collection of knowledge is meant to be a direct path, helping you get to the fun part of creating without the initial confusion or frustration. It is about making the process accessible and enjoyable, right from the very beginning, so it's a bit like a shortcut.
Making your own balloon arch gives you a lot of freedom, too. You get to pick the exact colors, the sizes, and the overall look that matches your party's theme perfectly. There is a real satisfaction in seeing your vision come to life, knowing you created it yourself. It is a rewarding experience that adds a personal touch to your celebration, and that is something guests truly appreciate, you know, in a way.
Getting Started - Your First Steps to How to Make a Balloon Arch
To begin making a balloon arch, you will find there are a few different approaches you can take. The method you choose usually depends on the particular look you are hoping to achieve for your display. You can decide to make a balloon arch by fastening balloons onto some kind of base, like a long strip or a piece of line. This choice gives you a lot of flexibility in how your finished arch will appear, which is pretty good, you know.
One common way involves using a special plastic strip with holes or a sturdy fishing line, or even a strong piece of string. You simply attach the inflated balloons to this base, one after another, building up the shape. This technique allows for a really flowing, organic look that can be shaped into a curve or a more free-form design. It is a very popular way to go about it because it is quite forgiving, and you can adjust things as you go, which is helpful, that.
Another approach might involve creating smaller clusters of balloons and then joining those clusters together. This can give a fuller, more layered appearance to your arch. Whichever way you lean, the basic idea is to connect many balloons in a way that creates a large, impressive structure. It might seem like a lot of steps, but each one is pretty simple on its own, so it's not as hard as it looks, really.
Air or Helium - Which Way to Make a Balloon Arch?
When it comes to putting together a balloon arch without needing a special stand, there are actually two main ways you can fill your balloons. You can either use regular air, or you can use helium. Both methods have their own benefits, and the choice often comes down to what kind of look you want and what your budget allows, which is something to think about, you know.
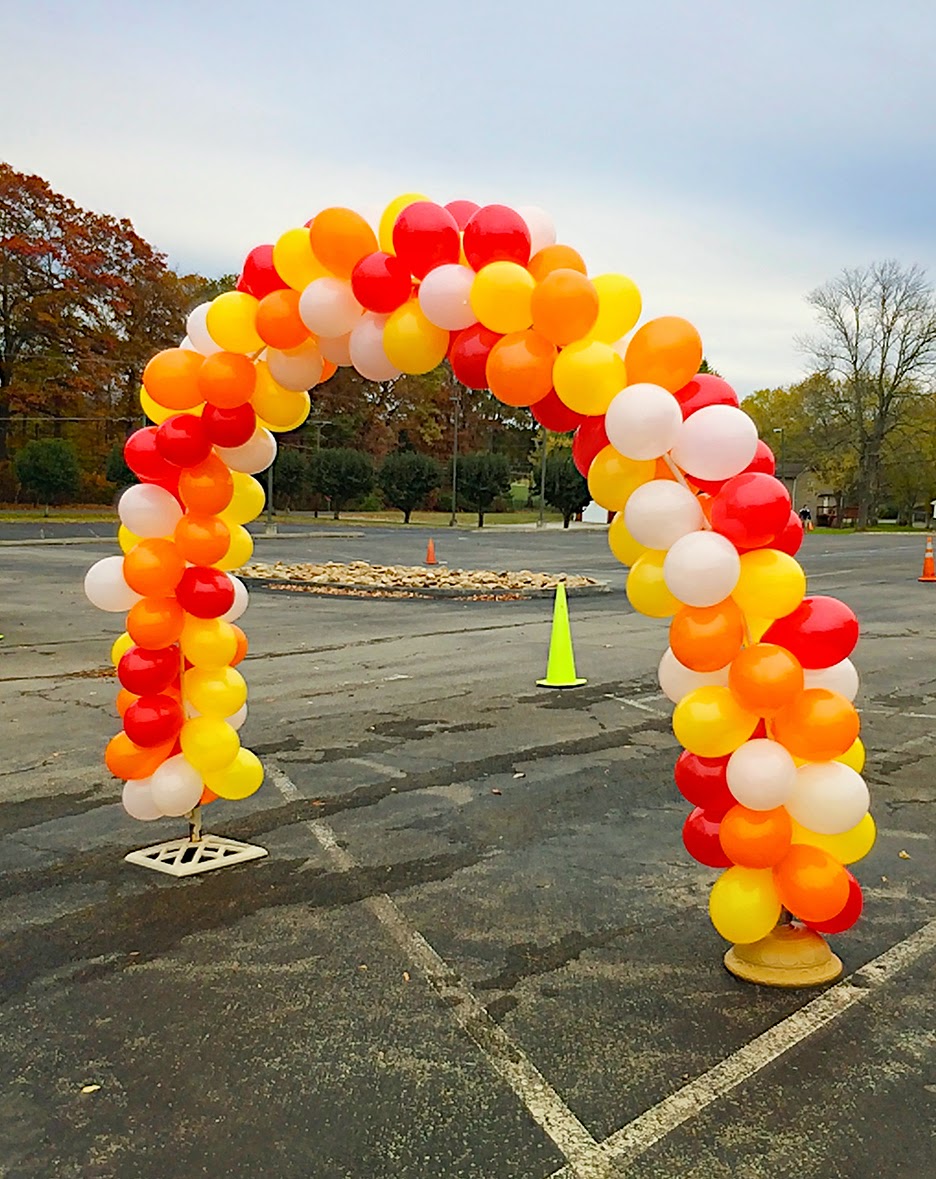
Balloon arches can be filled with just air, which is a very common choice. Air-filled balloon arches are, in general, much less costly than those filled with helium. This is because air is free, and you only need a pump to get the balloons inflated. They will not float on their own, of course, so you will need to secure them to a structure or a wall to get that arch shape. This makes them a really good option for decorations that are meant to stay in one place, like against a backdrop or around a doorway, so it's a very practical choice.
On the other hand, if you fill your balloons with helium, they will float. This means you can create an arch that appears to defy gravity, perhaps curving gracefully over a table without needing a solid frame underneath. However, helium can be quite expensive, especially if you need a lot of it for a large arch. So, while the floating effect is pretty striking, it does come with a higher price tag. Most people, for a do-it-yourself project, tend to go with air-filled arches because they are more budget-friendly and still look fantastic, honestly.
What Tools Do You Need to Make a Balloon Arch?
To get started on your balloon arch project, you will need a few basic items. These are mostly things that help you inflate the balloons and then put them together. The main thing, obviously, is a good supply of balloons in the colors and sizes you want. Having a mix of sizes can make your arch look a bit more interesting and full, which is a good tip, you know.
Next, you will definitely want some way to inflate all those balloons. A hand pump works, but for a big arch, an electric balloon pump is a true lifesaver. It makes the whole process much faster and saves your breath. You will also need something to connect the balloons. This could be a special balloon decorating strip, which is a long plastic tape with holes, or simply a strong fishing line or sturdy string. Some small, clear elastic bands or balloon tying tools can also make the process a bit easier on your fingers, which is nice, you know.
Finally, depending on where you plan to put your arch, you might need some wall hooks, command strips, or even heavy objects to anchor the ends if it is a free-standing design. Scissors are always handy for cutting string or tape. Having all these bits and pieces ready before you start will make the whole process flow much more smoothly, which is what you want, really.
Step-by-Step Guide - How to Make a Balloon Arch with Air
Making an air-filled balloon arch is a pretty straightforward process once you know the steps. This method is really popular because it is cost-effective and still gives you a truly impressive display. So, let us walk through how you can put one together, which is pretty exciting, you know.
First off, you will want to inflate your balloons. If you are using an electric pump, this part goes very quickly. Inflate balloons to slightly different sizes to give your arch a more natural, organic feel. You do not want them all to be exactly the same size, as that can look a little too uniform. Once inflated, tie them off. Some people like to tie two balloons together by their tails, forming pairs, which can make the next step a bit easier, so it's a good trick, that.
Next, you will start attaching your balloons to your chosen base. If you are using a balloon decorating strip, you will pull the tied necks of the balloons through the holes in the strip. Alternate sides as you go, pushing the balloon knots into the smaller part of the hole to secure them. If you are using fishing line or string, you can tie the balloons directly onto the line, or you can tie those pairs you made earlier onto the line, twisting them around the line to keep them in place. Keep adding balloons, pushing them close together to make a full, dense look. The tighter they are packed, the better the arch will hold its shape, which is important, really.
As you add more balloons, you will start to see the arch take shape. You can bend and manipulate the strip or line to create the curve you want. Sometimes, you might find little gaps. You can fill these in by adding smaller balloons, perhaps using glue dots or clear tape to stick them into the empty spots. This makes the arch look even fuller and more professional, which is nice, you know. Take your time with this part, as getting the fullness right really makes a difference, so it is worth the effort.
Once your arch is as full and long as you need it to be, it is time to put it in its place. You can use command hooks on a wall, or tie the ends to existing fixtures like curtain rods or door frames. If it is a free-standing arch, you will need some kind of weighted base at each end to keep it upright. Make sure it is securely fastened so it does not shift or fall during your event. A little bit of careful placement now saves a lot of worry later, which is something to consider, you know.
Finally, step back and admire your handiwork! You have created a beautiful, eye-catching decoration all by yourself. It is a rewarding feeling, and your guests will surely be impressed by the effort and the lovely display. This method is pretty forgiving, so even if a few balloons are not perfect, the overall effect will still be wonderful. It is about having fun with it, after all, and making something special, which is the main thing, really.
Creative Ideas for Your Next How to Make a Balloon Arch Project
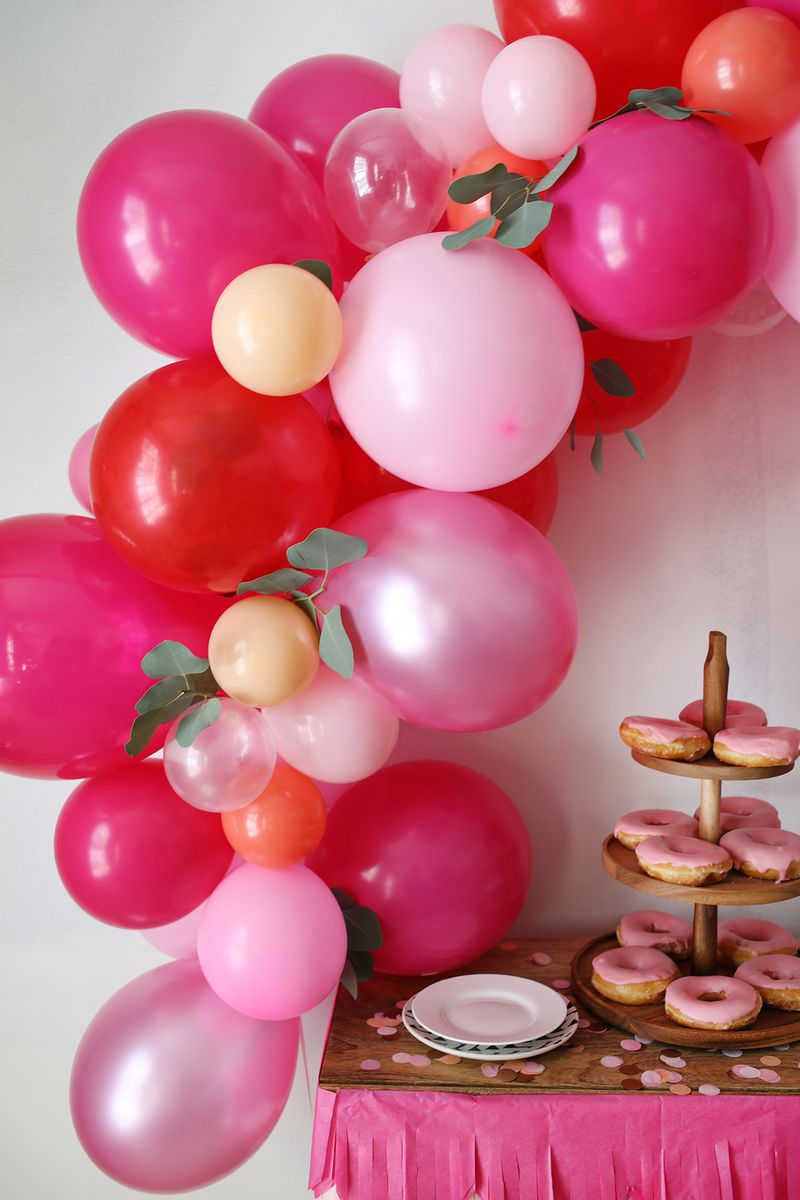
A do-it-yourself balloon arch is a truly wonderful decoration for so many different types of celebrations. Think about birthday parties, whether for a little one or someone much older. They add a burst of color and a festive feel that really sets the mood. For graduations, an arch can make a fantastic photo backdrop, marking a big achievement with a grand flourish. And for baby showers, a soft, pastel arch can create a sweet and welcoming atmosphere, which is very fitting, you know.
Once you get the hang of making one, you will quickly discover that it truly lifts the spirits and adds to the enjoyment at any event. It is not just about the balloons themselves, but the feeling they create. Imagine walking into a room and seeing a vibrant arch; it immediately tells you that this is a place for celebration and joy. This simple skill opens up a whole new world of party decorating possibilities, which is pretty cool, you know.
You can truly tailor your arch to fit any theme. For a child's birthday, you might use bright, primary colors and even add some character balloons. For a more sophisticated adult party, perhaps a mix of metallic and muted tones would work better. The versatility of a balloon arch means it can be adapted for almost any occasion, from a formal gathering to a very casual get-together. It is all about choosing the right colors and perhaps adding a few extra bits like artificial flowers or ribbons, which can make it even more special, too.
Final Touches for Your Balloon Arch Creation
Once your main balloon arch is assembled and in place, there are often little things you can do to make it look even better. These small additions can really take your creation from good to truly amazing. Think about adding some smaller balloons, perhaps in contrasting colors or different textures, to fill in any gaps you might see. These can be attached with glue dots or even just tucked in firmly, which is a pretty simple way to add fullness, you know.
Consider incorporating other decorative elements as well. Ribbons, strands of fairy lights, or even some artificial greenery can be woven into the arch to give it a more layered and interesting look. For a baby shower, tiny stuffed animals or little cut-out shapes can be added. For a more grown-up event, maybe some glittery elements or metallic accents would work well. These extra touches help to tie the arch into your overall party theme and make it feel more cohesive, which is nice, really.
Finally, think about the lighting around your arch. Good lighting can truly make the colors pop and highlight your hard work. If it is an evening event, some soft uplighting or string lights can create a magical glow. Taking a moment to adjust the balloons, ensuring they are all facing the right way and are evenly distributed, can also make a big difference in the final appearance. These little adjustments show care and attention to detail, making your balloon arch truly shine, so it's worth the extra minute, you know.