Let’s face it, folks—connecting to IoT devices using SSH on your Mac has become a necessity in today’s tech-driven world. Whether you're a developer, a hobbyist, or just someone who loves tinkering with gadgets, understanding how to SSH into IoT devices is like having a secret superpower. It’s not just about remote access; it’s about control, efficiency, and unlocking the full potential of your connected devices. So, buckle up, because we’re about to dive deep into the world of SSH login on Mac for IoT devices.
In this digital era, IoT devices are everywhere—from smart home gadgets to industrial sensors. And guess what? Most of them can be managed remotely via SSH. But here’s the catch: not everyone knows how to do it right. That’s where this guide comes in. We’ll break it down step by step, so even if you’re a newbie, you’ll feel like a pro by the end of it.
Now, before we get into the nitty-gritty, let me tell you something important. This isn’t just another tech article. We’re going to make it fun, engaging, and super easy to follow. Think of it as a friendly chat over coffee, but instead of coffee, we’ve got SSH commands and IoT devices. Ready to roll? Let’s go!
Read also:Salt Trick Penis The Truth Behind The Hype And What You Need To Know
Why SSH Login for IoT Devices on Mac Matters
First things first, why should you care about SSH login for IoT devices on your Mac? Well, let me break it down for you. SSH, or Secure Shell, is like a secure tunnel that lets you remotely control and manage devices. It’s not just about convenience; it’s about security, too. With SSH, you can access your IoT devices from anywhere, without worrying about hackers sneaking in. And let’s be honest, who doesn’t want that?
Here’s the deal: IoT devices are powerful, but they’re also vulnerable. Without proper security measures, they can become an easy target for cybercriminals. That’s where SSH shines. It encrypts your connection, making it almost impossible for anyone to intercept your data. Plus, it’s super easy to set up on a Mac. So, whether you’re managing a smart thermostat or a fleet of industrial sensors, SSH has got your back.
Getting Started: Preparing Your Mac for SSH
Alright, so you’ve decided to dive into the world of SSH login for IoT devices on your Mac. Great choice! But before we start typing commands, let’s make sure your Mac is ready for the job. First, you’ll need to enable SSH on your Mac. Don’t worry; it’s not as complicated as it sounds. Just head over to System Preferences, click on Sharing, and check the box that says Remote Login. Boom! You’re all set.
Next up, you’ll need to know the IP address of your IoT device. This is like the device’s home address on your network. You can usually find it in the device’s settings or by using tools like ping or nmap. Once you’ve got the IP, you’re good to go. But wait, there’s more! Make sure your Mac and the IoT device are on the same network. Trust me, this will save you a ton of headaches later on.
Tips for a Smooth Setup
- Double-check your network settings to avoid connection issues.
- Use a reliable Wi-Fi connection for a stable SSH session.
- Keep your Mac and IoT devices updated to ensure maximum security.
Understanding the Basics of SSH
Now that your Mac is ready, let’s talk about the basics of SSH. Think of SSH as a secure communication channel between your Mac and the IoT device. It’s like sending a letter in a locked box, where only the sender and the receiver have the key. Cool, right? But how does it work? Simple. SSH uses encryption to protect your data while it’s being transmitted. This means that even if someone intercepts your connection, they won’t be able to make sense of the data.
Here’s the best part: SSH is not just about remote access. It also allows you to transfer files, run commands, and even set up secure tunnels for other applications. So, whether you’re troubleshooting a device or deploying new firmware, SSH has got you covered. And the best part? It’s all done through a simple command-line interface. No fancy GUIs here, just raw power.
Read also:Amelia Heinle Thad Luckinbill A Story Of Love Loss And Legacy
SSH Commands You Need to Know
ssh username@ip_address: Connect to an IoT device using SSH.scp file_name username@ip_address:/path/to/destination: Transfer files to an IoT device.ssh-keygen: Generate SSH keys for secure authentication.
Connecting to IoT Devices via SSH
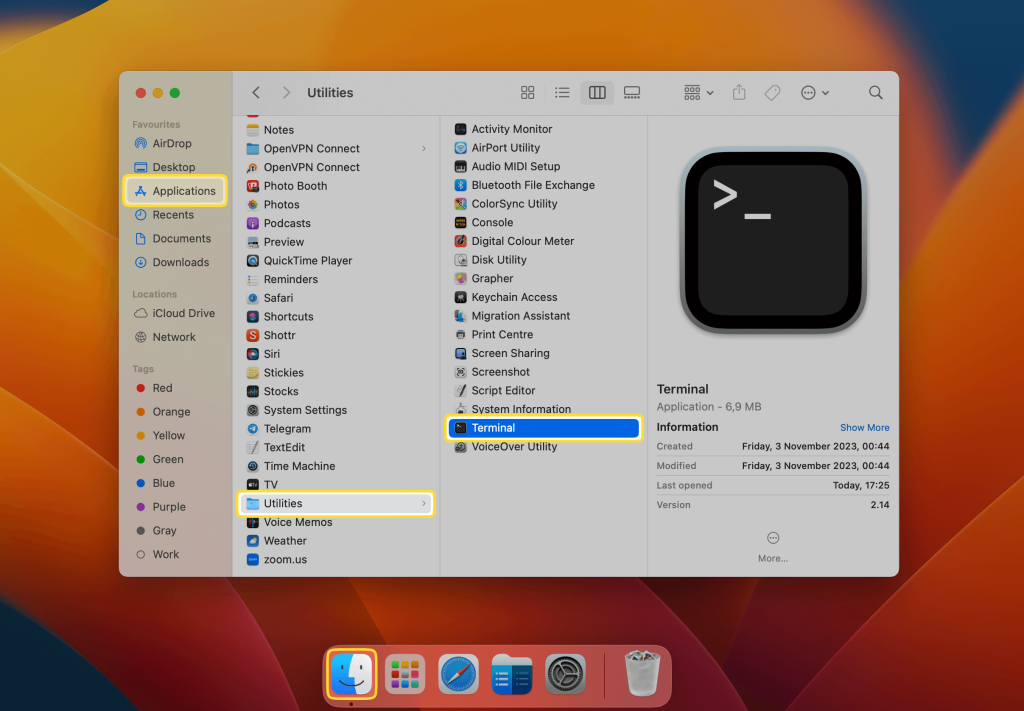
Alright, now that you know the basics, let’s get down to business. Connecting to an IoT device via SSH is as easy as pie. All you need is the device’s IP address and a username. Open up your Terminal app on your Mac, type in the command ssh username@ip_address, and hit Enter. If it’s your first time connecting, you might see a warning about the authenticity of the host. Don’t panic! Just type yes and hit Enter again. Voilà! You’re in.
But wait, there’s more! If you’re tired of typing your password every time you connect, you can set up SSH keys for passwordless authentication. Trust me, it’s a game-changer. Just run the command ssh-keygen to generate a key pair, then copy the public key to your IoT device using the ssh-copy-id command. From now on, you’ll be able to log in with just a single command. How cool is that?
Best Practices for Secure Connections
- Always use strong passwords or SSH keys for authentication.
- Disable password authentication if you’re using SSH keys.
- Regularly update your SSH client and server software.
Troubleshooting Common SSH Issues
Let’s be real, folks—things don’t always go as planned. Sometimes, you’ll run into issues when trying to connect to an IoT device via SSH. Don’t worry; it happens to the best of us. The key is knowing how to troubleshoot these problems. For starters, make sure your device is online and reachable. You can use the ping command to check if the device is responding. If it is, but you still can’t connect, try restarting the SSH service on the device.
Another common issue is permission denied errors. This usually happens when the device doesn’t recognize your SSH key or password. In that case, double-check your credentials and make sure the key is properly installed on the device. If all else fails, consult the device’s documentation or reach out to the manufacturer’s support team. They’re usually happy to help.
Tools for Debugging SSH Connections
ssh -v: Verbose mode for detailed connection logs.netstat: Check open ports and connections on your device.telnet: Test port connectivity to your IoT device.
Advanced SSH Techniques for IoT Devices
Now that you’ve mastered the basics, let’s take things up a notch. There are plenty of advanced SSH techniques you can use to enhance your IoT device management. For example, you can set up SSH tunnels to securely access services running on your IoT device. This is especially useful if you’re managing sensitive data or running web servers on your device.
Another cool trick is using SSH multiplexing to speed up your connections. This allows you to reuse existing SSH sessions instead of creating new ones every time. Not only does it save time, but it also reduces the load on your device. Plus, you can automate repetitive tasks using SSH scripts. Imagine being able to deploy updates or run diagnostics with a single command. Sounds pretty awesome, right?
SSH Configuration Tips
- Use SSH config files to store connection details for easy access.
- Enable compression for faster data transfer over slow networks.
- Limit the number of login attempts to prevent brute-force attacks.
Security Best Practices for SSH on Mac
Security should always be at the top of your mind when dealing with SSH. After all, you’re giving someone (or something) access to your device. So, how do you keep your SSH connections secure? First, always use strong passwords or SSH keys. Avoid using default usernames and passwords, as they’re the first thing hackers look for. Second, disable password authentication if you’re using SSH keys. This ensures that only authorized users can access your device.
Another important tip is to keep your SSH client and server software up to date. Manufacturers regularly release security patches to fix vulnerabilities, so staying current is crucial. Finally, consider using firewalls or network segmentation to further protect your IoT devices. By following these best practices, you’ll ensure that your SSH connections are as secure as possible.
SSH Security Tools
fail2ban: Prevent brute-force attacks by banning malicious IP addresses.ufw: Simple firewall management for Linux-based IoT devices.auditd: Monitor SSH activity for suspicious behavior.
Conclusion: Taking Your SSH Game to the Next Level
And there you have it, folks—a comprehensive guide to SSH login for IoT devices on your Mac. From setting up your Mac to advanced SSH techniques, we’ve covered it all. But remember, the journey doesn’t end here. As technology evolves, so do the tools and techniques we use to manage our devices. So, keep learning, experimenting, and pushing the boundaries of what’s possible.
Before you go, I want to leave you with one final thought. SSH isn’t just a tool; it’s a mindset. It’s about taking control of your devices, securing your connections, and unlocking the full potential of your IoT ecosystem. So, whether you’re managing a smart home or a fleet of industrial sensors, SSH is your trusty sidekick. Now, go out there and show those IoT devices who’s boss!
Oh, and don’t forget to share this article with your friends and colleagues. The more people know about SSH, the better. And if you have any questions or feedback, feel free to drop a comment below. We’d love to hear from you!
Table of Contents
- Why SSH Login for IoT Devices on Mac Matters
- Getting Started: Preparing Your Mac for SSH
- Understanding the Basics of SSH
- Connecting to IoT Devices via SSH
- Troubleshooting Common SSH Issues
- Advanced SSH Techniques for IoT Devices
- Security Best Practices for SSH on Mac
- Conclusion: Taking Your SSH Game to the Next Level