Let’s get real here—IoT devices are everywhere, and if you're like me, you're probably wondering how to access IoT behind router Raspberry Pi examples without tearing your hair out. It's not as complicated as it sounds, but it does require some know-how. Whether you're building a smart home system or experimenting with IoT projects, understanding how to access your Raspberry Pi securely is key to unlocking its full potential.
Picture this: you’ve got your shiny new Raspberry Pi, a couple of sensors, and a dream to connect everything in your house to the internet. But wait—how do you make sure your IoT devices can talk to each other without exposing your network to hackers? That’s where this guide comes in. We’re going to break it down step by step so you can access your IoT setup from anywhere, even behind your router.
Before we dive in, let me just say this—if you’re new to networking or Raspberry Pi, don’t worry. This guide is written for people who want to learn without getting bogged down in tech jargon. By the end of this, you’ll have a solid understanding of how to set up and access your IoT devices securely, and you’ll be ready to take on more advanced projects. So, grab a coffee, and let’s get started!
Read also:Josh Gates Hospitalized 2024 The Inside Scoop You Need To Know
What You Need to Know About Accessing IoT Behind Router
First things first, let’s talk about why accessing IoT behind a router is even necessary. When you connect your Raspberry Pi to your home network, it usually gets an internal IP address that’s only accessible within your local network. This means that unless you set things up properly, you won’t be able to access your IoT devices from outside your home.
Why Is Security Important?
Security is a big deal when it comes to IoT. If you’re not careful, leaving your devices exposed to the internet can lead to all sorts of problems, from data breaches to unauthorized access. That’s why it’s crucial to set up your network properly, using tools like port forwarding and SSH tunnels to keep everything secure.
Basic Networking Concepts
- IP Address: Think of this as your device’s “home address” on the internet.
- Router: The gateway that connects your devices to the internet.
- Port Forwarding: A technique that allows you to direct traffic from the internet to a specific device on your network.
Understanding these basics will help you set up your Raspberry Pi and IoT devices more effectively. Don’t worry if it sounds confusing at first—we’ll go over everything in detail later on.
Setting Up Your Raspberry Pi for IoT
Now that you’ve got the basics down, let’s talk about setting up your Raspberry Pi for IoT. This is where the magic happens. You’ll need to install the right software, configure your network settings, and make sure everything is secure.
Step 1: Install the Right Software
The first step is to install an operating system on your Raspberry Pi. For IoT projects, Raspberry Pi OS is a great choice because it’s lightweight and supports a wide range of applications. Once you’ve installed the OS, you’ll want to install any additional software you need, like Node-RED or Mosquitto for MQTT communication.
Step 2: Configure Your Network Settings
Next, you’ll need to configure your network settings. This involves assigning a static IP address to your Raspberry Pi so that it always has the same address on your network. You’ll also want to set up SSH so that you can access your Pi remotely.
Read also:Hungry Temporary Replacement The Ultimate Guide To Navigating This Trend
Step 3: Secure Your Setup
Security is key, so make sure you take steps to protect your Raspberry Pi and IoT devices. This includes setting strong passwords, enabling firewalls, and using SSH keys instead of passwords for authentication.
Accessing IoT Devices Behind Router Raspberry Pi Example
Now that your Raspberry Pi is set up, it’s time to figure out how to access your IoT devices from outside your home network. This is where things get a little tricky, but don’t worry—we’ve got you covered.
Port Forwarding: The Simple Solution
One of the easiest ways to access your IoT devices is by using port forwarding. This involves configuring your router to direct incoming traffic on a specific port to your Raspberry Pi. For example, you could set up port forwarding for port 22 (the default SSH port) so that you can access your Pi remotely.
SSH Tunnels: A Secure Alternative
If you’re concerned about security, SSH tunnels are a great option. An SSH tunnel allows you to create a secure connection between your local machine and your Raspberry Pi, even if they’re on different networks. This is especially useful if you want to access your IoT devices from a public Wi-Fi network.
Dynamic DNS: Keeping Things Simple
Another option is to use dynamic DNS (DDNS). This service assigns a domain name to your router’s IP address, making it easier to access your IoT devices from anywhere. Just be sure to choose a reputable DDNS provider to ensure security.
Real-World Examples of IoT Behind Router Raspberry Pi
Let’s take a look at some real-world examples of how people are using Raspberry Pi for IoT projects. These examples should give you some inspiration and help you understand how to apply the concepts we’ve discussed.
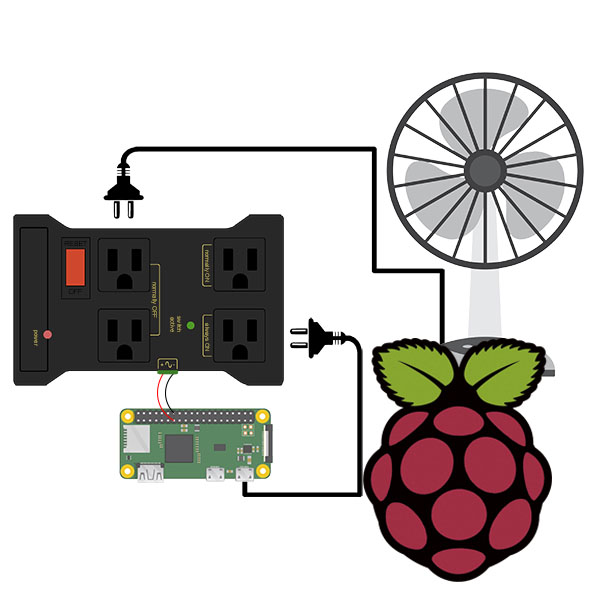
Example 1: Smart Home Automation
One of the most popular uses for Raspberry Pi in IoT is home automation. By connecting sensors and actuators to your Pi, you can control everything from lighting to temperature from your smartphone. Using tools like Node-RED, you can even set up automation rules to make your home smarter.
Example 2: Environmental Monitoring
Another great use case is environmental monitoring. With a Raspberry Pi and a few sensors, you can monitor things like temperature, humidity, and air quality in real-time. This data can be sent to a cloud service for analysis, or you can store it locally on your Pi.
Example 3: Remote Surveillance
For those who want to keep an eye on their property, Raspberry Pi can be used for remote surveillance. By connecting a camera to your Pi and setting up a web server, you can stream live video to your smartphone or computer. Just be sure to secure your setup to prevent unauthorized access.
Troubleshooting Common Issues
Even the best-laid plans can go awry, so let’s talk about some common issues you might encounter when setting up your IoT devices behind a router.
Issue 1: Can’t Access Raspberry Pi Remotely
If you can’t access your Raspberry Pi remotely, check your router’s port forwarding settings to make sure they’re configured correctly. You should also verify that SSH is enabled on your Pi and that your firewall isn’t blocking incoming connections.
Issue 2: Slow Connection
Slow connections can be frustrating, but they’re often caused by network congestion or poor Wi-Fi coverage. Try moving your router closer to your Pi or switching to a wired connection to improve performance.
Issue 3: Security Concerns
If you’re worried about security, make sure you’re using strong passwords, enabling firewalls, and using SSH keys for authentication. You should also keep your software up to date to protect against vulnerabilities.
Best Practices for Securing Your IoT Devices
Security should always be a top priority when working with IoT devices. Here are some best practices to help you keep your setup safe:
- Use strong, unique passwords for all your devices.
- Enable firewalls and use SSH keys for authentication.
- Keep your software up to date to protect against vulnerabilities.
- Limit access to your IoT devices by using VLANs or separate networks.
Resources and Tools for IoT Projects
There are plenty of resources and tools available to help you with your IoT projects. Here are a few that I recommend:
Tools
- Raspberry Pi OS: A lightweight operating system designed for IoT projects.
- Node-RED: A visual programming tool for wiring together IoT devices.
- Mosquitto: An open-source MQTT broker for messaging between devices.
Resources
- Official Raspberry Pi Documentation: A great starting point for learning about Raspberry Pi.
- IoT Stack Exchange: A community-driven Q&A site for IoT enthusiasts.
- GitHub: A treasure trove of open-source IoT projects and code examples.
Conclusion
Accessing IoT behind router Raspberry Pi examples might seem intimidating at first, but with the right tools and knowledge, it’s definitely doable. By following the steps outlined in this guide, you’ll be well on your way to setting up a secure and functional IoT network. Remember to prioritize security, keep your software up to date, and don’t be afraid to experiment with new ideas.
So, what are you waiting for? Grab your Raspberry Pi, fire up your favorite text editor, and start building your IoT dream project. And don’t forget to share your progress in the comments below—I’d love to hear about your experiences!
Table of Contents
- What You Need to Know About Accessing IoT Behind Router
- Why Is Security Important?
- Basic Networking Concepts
- Setting Up Your Raspberry Pi for IoT
- Step 1: Install the Right Software
- Step 2: Configure Your Network Settings
- Step 3: Secure Your Setup
- Accessing IoT Devices Behind Router Raspberry Pi Example
- Port Forwarding: The Simple Solution
- SSH Tunnels: A Secure Alternative